
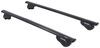
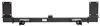
Trailer Mate Trailer Hitch Receiver - Custom Fit - Class III - 2"


To see if this custom-fit item will work for you please tell us what vehicle you'll use it with.


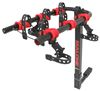
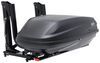
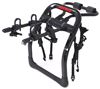
Your vehicle might just need a hitch that fits, works, and holds up. This one's built for everyday use, but not oversized jobs. It's perfect for adding a bike rack or cargo carrier for weekend trips, or towing a utility trailer to the store.
You don't need a heavy-duty truck to get out there with your gear. With 3,000 lbs of towing capacity and 300 lbs of tongue weight, this hitch is built for everyday use. It's right at home carrying a cargo tray for a weekend trip, taking bikes out to the trailhead, or even hauling a small trailer to the hardware store. The 2" receiver is what most racks, trays, and ball mounts are designed for, so chances are the gear you already have (or the gear you want) will slide right in. You shouldn't have to hunt for an adapter to make your accessory work. And it's Class III, which means it's strong enough for regular use, not just occasional hauling.
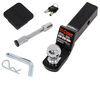
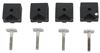
This hitch bolts directly to the frame using included hardware and the tools most folks already have in the garage. There's no need to drill into the vehicle or weld anything in place, and you won't be cutting up the bumper just to make it fit. It's designed for a simple install whether you're putting it on yourself or having a shop handle it. If you'd rather not DIY, we can help you find a local installer using our dealer locator.
This hitch meets SAE J684 standards, so it's been tested to handle its rated capacity under real towing conditions. You may not spend time thinking about certifications, but they matter when you're pulling weight. This one covers strength, performance, and structural integrity, so you're working with something that's actually been proven, not just claimed.
California residents: click here
Videos are provided as a guide only. Refer to manufacturer installation instructions and specs for complete information.
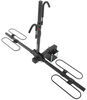
Hi, I'm Greg with etrailer. Today we're gonna take a look at our Trail-A-Mate Trailer Hitch on our 2025 Subaru Forester. Okay, some of the nice features of this hitch, it's a nice economical hitch. It's got a nice black finish on it so it kind of blends into the vehicle well, looks good on this vehicle. It's good for most of your bike racks, cargo carriers, and some light duty towing. The under hitch does have a standard two by two opening, which'll take most of your accessories.
It takes a standard five eighths pin and clip, (pin clinks) which does not come with it, but it comes with most of your accessories. Your safety loop is located below it (chains jingle) and it looks like it'll fit (hook clangs) most of your clevis hooks (hook clangs) and your S-hooks fairly easily. Also, I would recommend a locking pin for your hitch to protect anything, any of your accessories you might have on there. And now we'll take look at some measurements. We'll measure from the ground to the inside of our opening.
We are at 14 and a quarter inches, which is pretty adequate ground clearance, especially if you have your bike rack or anything that comes out past here, if you're going up any steep driveways or inclines. From the center of your pin out to the balance, we are at three and a half inches. (tape measure snaps) So, you just wanna make sure that you do, if you have any folding accessories, that you're gonna be clear of your fascia whenever that is in the upright position. Okay, and the capacities for this hitch, we have a 300 pound tongue weight capacity, which is pretty good. It's the downforce on the hitch, which would handle most of your bike racks and cargo carriers.
It's also got a 3000 pound towing capacity, which is the amount you can pull behind the hitch. You will want to check with your owner's manual to check for the specifications on your vehicle and go with the lowest number. Okay, overall, this is a pretty basic install. You can do it in your garage or in your driveway. If you don't have the time or don't feel like you're want to deal with it, check our dealer locator and find someone near you that can install it for you.
Please leave any questions or comments with us. And now, if you wanna install it, follow me and we'll get this thing installed. To start our install, we're gonna have to lower our exhaust. Put a strap up here to hold the exhaust once we get it off our isolators. You might want silicone to put on each of your bushings. It'll help 'em come off a lot easier. (can clatters) We'll start with this one here. (tool clinks) Try to get that. (tool clinks) Try and get off that. (tool clinks) There we go. And some of these are easier to get off of the body instead of the muffler itself. (tool clinks) (muffler clatters) There we go. Okay, and one here towards the center. (tool clinks) There we go. Now we can lower our exhaust. Okay, we'll need to remove the heat shield. There's five 10 millimeter bolts or they have a Phillips head if you'd rather use that. (tool bursts) (tool bursts) (tool bursts) (tool bursts) (tool bursts) And one up on the side. (tool bursts) (heat shield clatters) Okay, the next step is we'll go ahead and remove this underbody panel. We got two 10 millimeter bolts, some moving ones that were on the heat shield and there's one, there's five push pins, one also up in the fender wall, we'll need to take out. (tool buzzes) (tool buzzes) I'm gonna go take these out, we're gonna go ahead and use a flathead screwdriver and sometimes it'll pull up with your fingers. Or you might have a trim tool that you can use. Make it a little easier. These are coming out pretty good though. I spoke too soon. (fastener pops) There we go. And you got one up here in behind the tire, in the wheel well, (fastener pops) pop that out. And there is another one. There's two up in the fender wall behind the tire, you'll have to remove. and there's a little tab right here, you're gonna have to push it up to get it out of there, which makes it challenging. (part rattles) There it is. Okay, next we're gonna go ahead and remove our three rubber plugs to expose our hole, our holes for our bolts. (tool clinks) Now, we'll do this on both sides. And keep in mind, anything we're doing on this side we'll be repeating on the other. Okay, now we're gonna enlargen our center hole, to the specifications in the instructions. (tool buzzes) (tool buzzes) After we enlarge our hole, we want to afix some paint. You can take paint or clear coat, just to go ahead and touch up that raw metal so you don't have any worry about rust. We'll take our supplied fish wire, feed it through, to fish our hardware in. Thread that onto the fish wire (wire rattles) and then the carriage bolt and pull that down. And with the larger hole, we'll go ahead and put our bolt in first (bolt rattles) and then our spacer blocks. (block rattles) Come on. (hardware rattles) There we go. Okay, we went ahead and marked our heat shield for the two holes for our bolts to come through. Follow your instructions and you can also hold this up underneath the car to get a little visual. Make sure you're in the right spot. (tool zips) (tool hums) (tool buzzes) (tool screeches) (tool hums) (tool buzzes) Now, I'm gonna take the step bit and open the holes up just a little bit so when we put it up, we don't have any problem with the bolts coming through or any binding. (tool buzzes) (tool buzzes) Now, we'll go ahead and reinstall our heat shield. (heat shield clatters) Okay, an extra set of hands. We're gonna go ahead and raise our hitch up into place. (hitch clangs) Slide it on your bolts. Be careful not to, (hitch clangs) try not to push your bolts into the frame. (hitch clangs) (hardware rasps) Okay, and once you get your flange nuts installed, go ahead and tighten 'em down. (tool bursts) (tool bursts) Now, we'll go ahead and torque our bolts to the specifications in our instructions. (torque wrench beeps) Okay, now we're gonna go ahead and raise our exhaust back up into place. (exhaust clinks) Tighten our. (exhaust rattles) We'll reinstall our underbody panel. (panel clatters) Okay, and when you put your underbody panel back on, you will only use one of the screws out here to hold it up because the hitch will interfere with the other one. But you have plenty of fasteners, if they can hold it in place and it, you don't have to worry about it (tool buzzes) coming loose. And that'll do it for our install of our Trail-A-Mate Trailer Hitch on our 2025 Subaru Forester.

The hitch was packaged well, shipped quickly and came with all hardware and directions to get it mounted. I chose this hitch over a hidden style hitch because the description said it was a 'bolt on' hitch with 'no drilling or welding required.' I did end up buying a step drill bit so I could get the mounting plates and bolts fished through the frame. I did bore out holes in the heat shield for the hitch bolts but ended up using tin snips to cut the shield so it would fit around the hitch. It bolted up tight and 99% of the shield remained in place. The hitch is solid and will work well for cargo and bike racks. If you own a 2019 Forester do plan on drilling to enlarge a 1 1/8 hole so mounting plate and bolt can be installed. There is plastic trim on the drivers side rear as well - Two 10mm and a few push-pins secure it in place. Remove those and work around it, no need to cut or modify. Once the hitch is in, the trim will bend into place as you tighten the 10mm. Lube on the exhaust hangers make it very quick - use generously and the large rubber hangers will pull off quite easily. Overall, the quality is what I expected. I do think the description should be modified since drilling was required. A person could use a file or dremel as well - point being you need a larger hole to get the mounting hardware needed in place.
On and using !! Love it and the price!
Info for this part was:
At etrailer.com we provide the best information available about the products we sell. We take the quality of our information seriously so that you can get the right part the first time. Let us know if anything is missing or if you have any questions.


Thank you! Your comment has been submitted successfully. You should be able to view your question/comment here within a few days.
Error submitting comment. Please try again momentarily.